Guys, it’s Easter this weekend! Personally, I am really looking forward to a 4-day weekend and our little getaway to Bruges, but I couldn’t wait to start enjoying some chocolate crafty fun. I’ve never made Easter eggs before and always thought it looked fiddly and perhaps not worth the effort, but this year I wanted to give it a try as a bit of an experiment and so Mark and I could have some fun painting them.
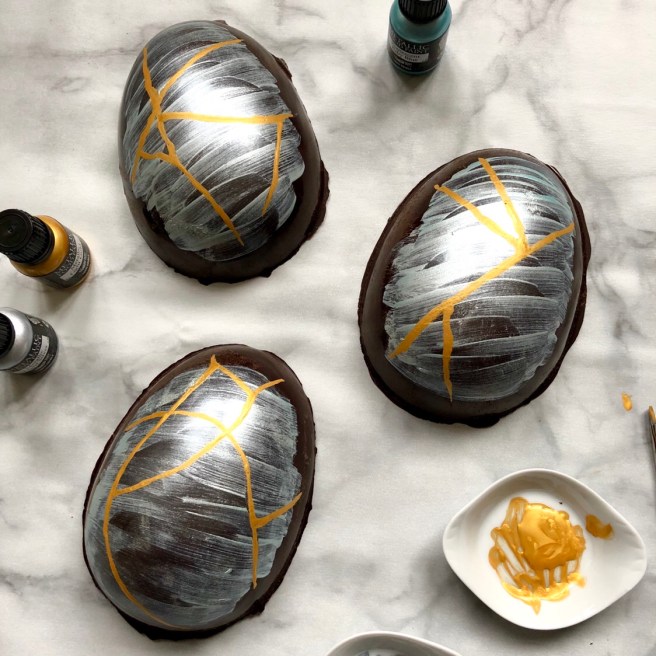
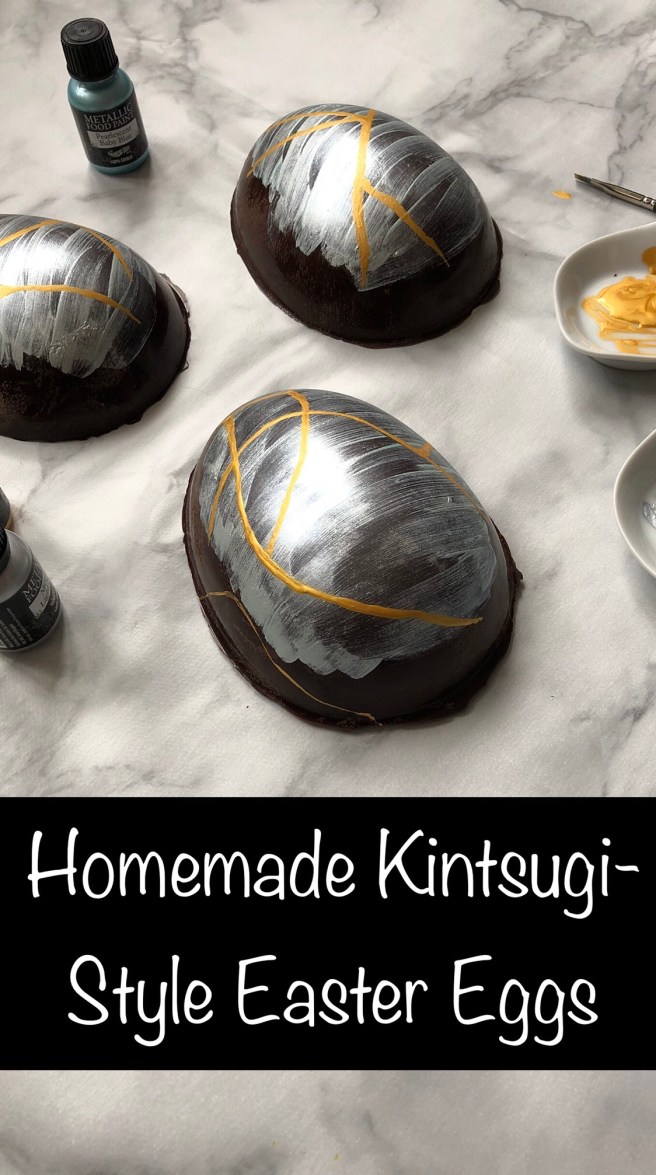
I had the idea for how I wanted to decorate them after seeing a friend’s Instagram post about the Japanese art of kintsugi. Kintsugi is a beautiful practice of repairing broken ceramics using a gold or silver lacquer to celebrate an object’s story rather than throwing it away or hiding the breakage. The result is really stunning and gives these broken pieces a new character. I love the message behind kintsugi – perhaps it’s a neat metaphor for other areas of life too – so I wanted to use it as inspiration for my somewhat abstract egg decoration.
I made sure I was prepared ahead of time with moulds for the eggs themselves with these simple plastic moulds from Denny Craft Moulds (via Amazon). I wanted to use edible metallic paints to get the kintsugi effect and I found these paints from Rainbow Dust (also via Amazon). Then of course I bought some brushes that I could use exclusively for decorating food. As this was my first foray into chocolate decorating, I stuck to a simple Wilton Five-Piece Decorating Brush Set from Amazon.
I wanted to try tempering the chocolate which I’ve never done before. I broke the dark chocolate into rough pieces and kept aside about a quarter which I chopped more finely. I melted the roughly chopped chocolate over a Bain Marie and kept it over the heat until it reached around 55°C*. Then I took it off the heat, added the extra chocolate to help it cool, and stirred it over an ice bath until it got to 28/29°C*. It took a fair while but it got there eventually. Then it was back over the Bain Marie and heated back up to 32°C* which didn’t take long at all. Once the chocolate was tempered I poured it into the moulds and tried to make sure it was evenly distributed and not too thin in any areas. I have to say that part was pretty tricky as the melted chocolate would pool in the bottom of the moulds and leave the edges only thinly covered. The tempering seemed to work though, and the chocolate was shiny and had a good snap. There were some specs when taking the eggs out of their moulds – I’m not sure why and whether it’s because of the moulds I was using, or because I disturbed them a bit part-way through setting to redistribute the chocolate to areas that were dangerously thin.
*Temperatures are for dark chocolate. If using milk chocolate, temperatures are 45-50°C, 27-28°C, and 29-30°C respectively. If using white chocolate, temperatures are 45-50°C, 26-27°C, and 28-29°C respectively.
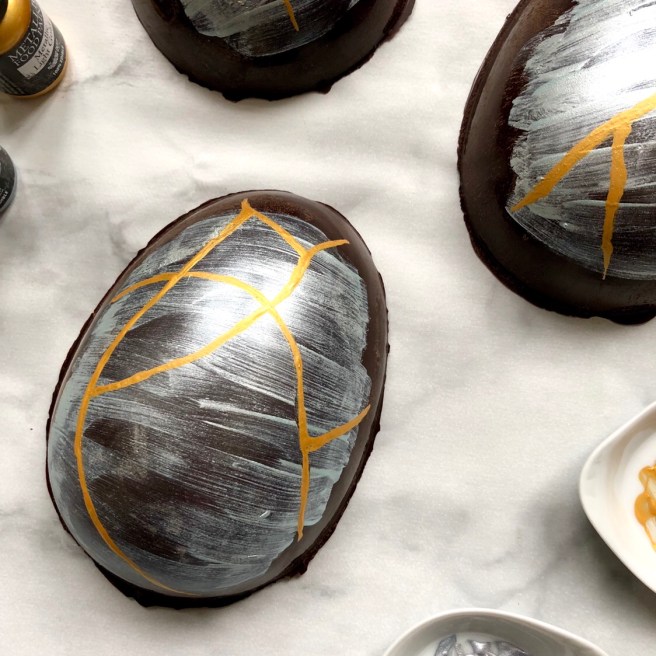
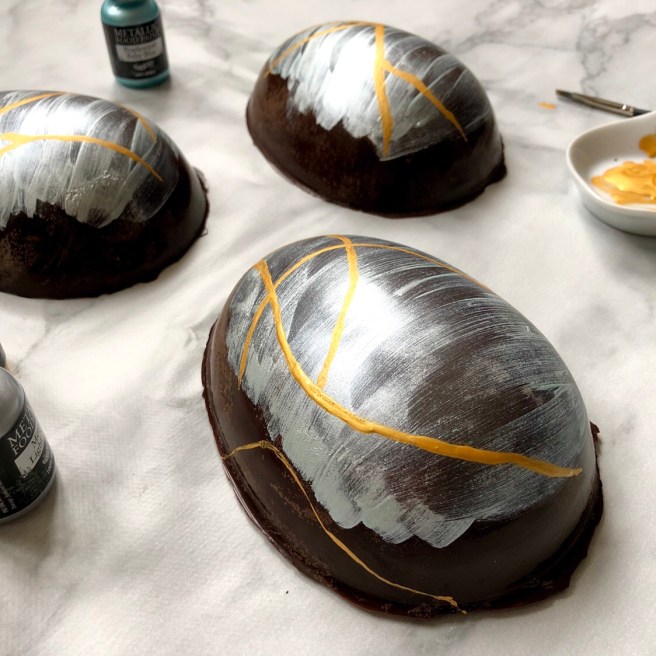
I love painting and that feeling of being in the zone and concentrating absolutely on something mindful and creative. Decorating the eggs was really fun and therapeutic and I was really pleased with the outcome. I felt it was really close to what I had imagined and I liked how the brush-stroke/wash effect worked out for the background to the gold “cracks”. I even managed a bit of genuine kintsugi on a bit of the egg that had broken when I got it out of the mould!
Assembling the eggs was nowhere near as difficult as I thought. I heated a flat baking sheet in the oven and placed each half on the sheet until the edges melted slightly (this helped to get rid of the bits of overhanging chocolate left from the edges of the mould). Once the edges were melted I placed the two halves together and held them for just a few moments until they were holding together pretty well on their own. I then carefully set them down on a small oven dish lined with tissue paper so that they didn’t roll around until they were fully set.
Making Easter eggs whilst a little fiddly, was not as horrendously difficult as I had imagined and gives you a great opportunity to make them your own with the decoration. I’ll definitely make my own Easter eggs again in the future.
Want to share this on Pinterest?
This is not a sponsored post and I am not part of an affiliate scheme. All mentions of products are purely as a guide and I have not been compensated to give the recommendations in this post. Please see the Disclosure Policy for more information.

Fantastic art-work, Liz! Happy Easter!
LikeLiked by 1 person
Thanks so much! Happy Easter!!
LikeLike